
This simple tutorial shows how to install and enable the Classic Gnome 2 style desktop session in Ubuntu 22.04 and/or Ubuntu 24.04.
Though the title said for Ubuntu, this tutorial also works in Debian 12 & 11. Fedora, Arch, and their based systems also have corresponding packages for the similar job.
As far as I know, there are 3 ways to get back the classic Gnome 2 layout. They include:
- Option 1:
gnome-flashback-traditional desktop session based on GNOME technologies. - Option 2:
gnome-shell-extensions– Classic Gnome 2 layout through some Gnome Shell extensions. - Option 3:
MATE Desktop– a free open-source fork and continuation of Gnome 2 Desktop.
Option 1: Gnome Flashback
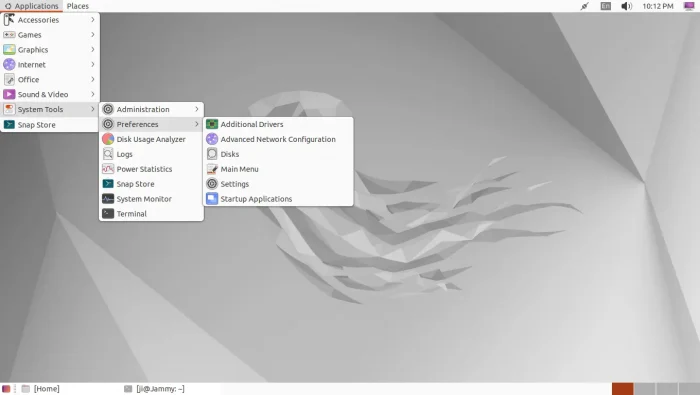
Gnome Flashback, formerly “GNOME Fallback”, is a session for GNOME 3, which provides GNOME 2 style user experience. The development currently lags behind a little, but it just works in current Ubuntu & Debian systems.
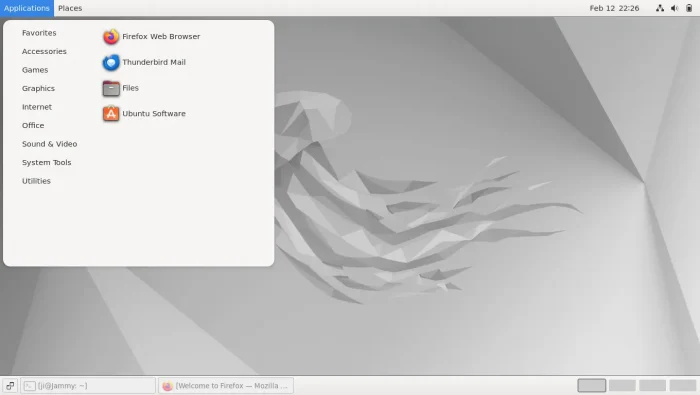
As you see in the screenshot above, it provides the classic multi-level drop-down applications menu and ‘Places’ menu to quickly access user folders (e.g., Documents, Downloads, Music, and more).
The system tray indicators and bottom task bar are all the classic Gnome 2 style. And, user can use alt + right-click on panel to open the menu to add/remove items to panel, access panel properties, and more.
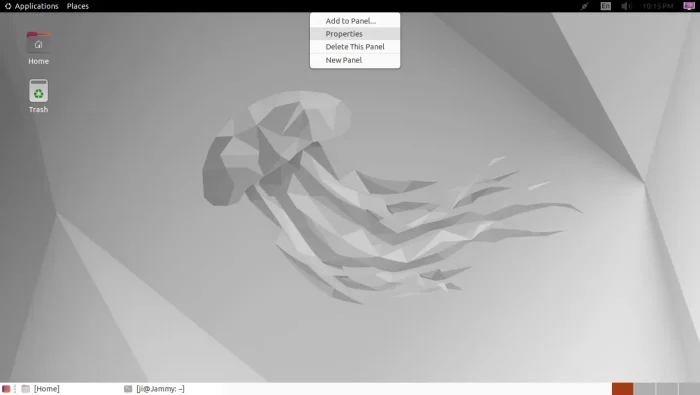
It does not use 3D acceleration at all, so it is generally faster and less CPU intensive than GNOME Shell.
However, the Gnome Flashback session is NOT well working in dark mode. Both panels can be switched to dark color, but the indicator applets on them are always light that’s not looking good.
To install Gnome Flashback, simply press Ctrl+Alt+T on keyboard to open terminal, then run command:
sudo apt install gnome-session-flashback
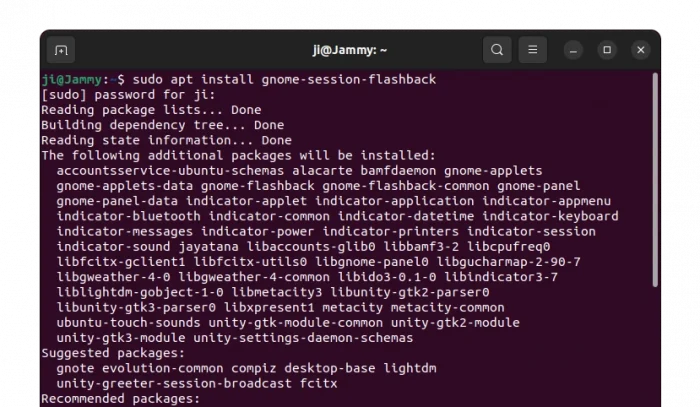
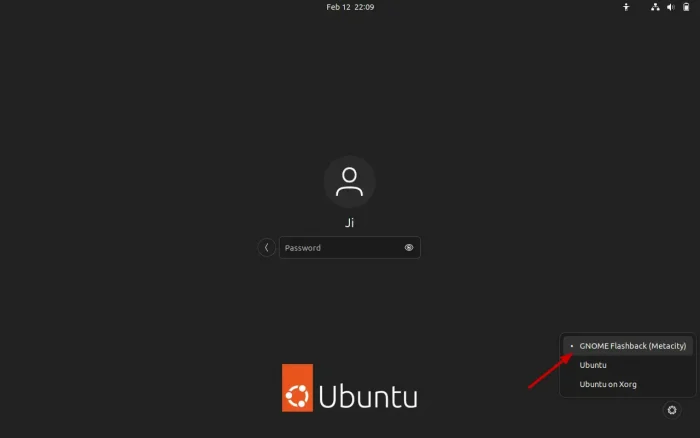
After installation, log out (or restart if need). Click your user in login screen, click the bottom right gear button and choose “GNOME Flashback (Metacity)“, finally type user password to login.
Uninstall Gnome Flashback
To uninstall this traditional desktop session, simply open terminal (Ctrl+Alt+T) and run command:
sudo apt remove --autoremove gnome-session-flashback gnome-flashback
Option 2: Gnome Shell Extensions
Debian, Ubuntu, Arch, Fedora, etc Linux contain a gnome-shell-extensions package in system repositories. Which, provides GNOME 2 style layout through extensions.
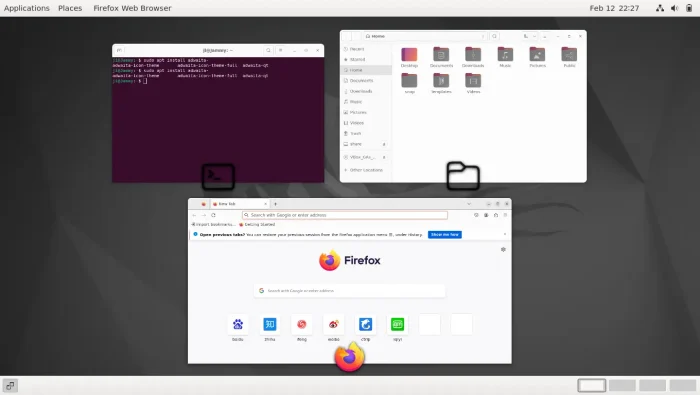
As you can see in the screenshot above, The modern Applications and Places menu, bottom task bar window lists, and workspace indicator are all implemented by Gnome Shell extensions.
The clock and system tray menus are totally same to the ones in current Gnome Shell. And, there’s an overview screen to manage all opened app windows.
The Gnome Classic mode implemented by extensions support both Xorg and Wayland sessions.
However, the dark panel mode does not play well with built-in themes. You can try third-party themes after enabled “User Themes” extension and use Gnome Tweaks to switch Shell theme under appearance tab.
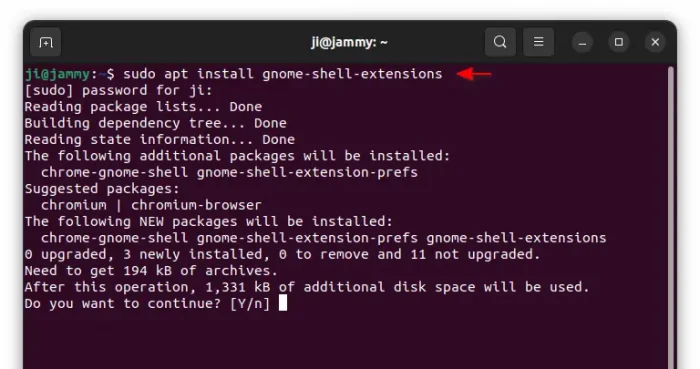
To enable Gnome Classic Mode via extensions, press Ctrl+Alt+T on keyboard to open terminal, then run command:
sudo apt install gnome-shell-extensions
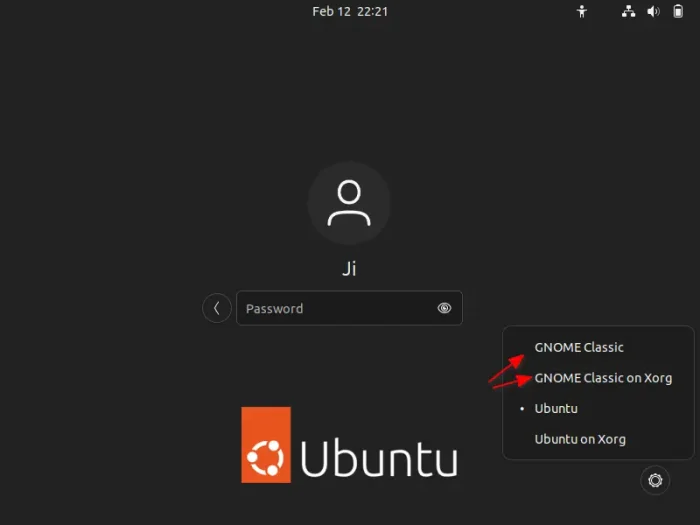
Then, log out and choose login with either GNOME Classic (Wayland) or GNOME Classic on Xorg session after selecting user account.
Uninstall:
To remove the classic session through extensions, simply open terminal and run command:
sudo apt remove --autoremove gnome-shell-extensions
Option 3: Get Gnome Classic layout through MATE
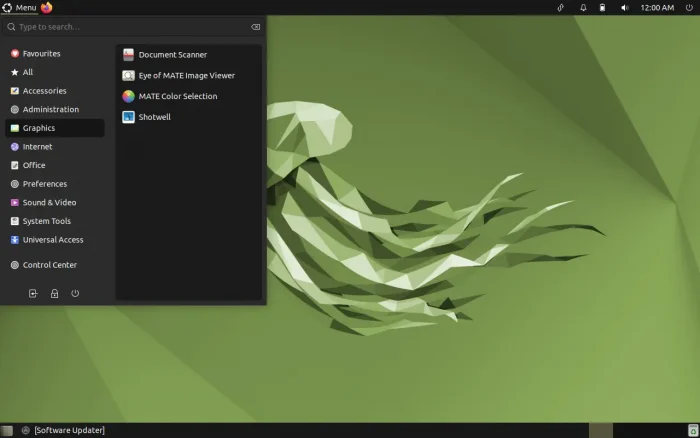
For long time use, MATE desktop is a good alternative to get the classic GNOME 2 layout.
It’s a lightweight desktop forked from GNOME 2, includes its own set of core apps forked from Gnome core apps. MATE fully supports the GTK-3 framework, and works great in dark mode.
Many Linux, including Ubuntu, Debian, Linux Mint, Fedora, Arch, and more, support MATE as optional desktop environment. Ubuntu user can download Ubuntu MATE and install it on your machine to get the desktop.
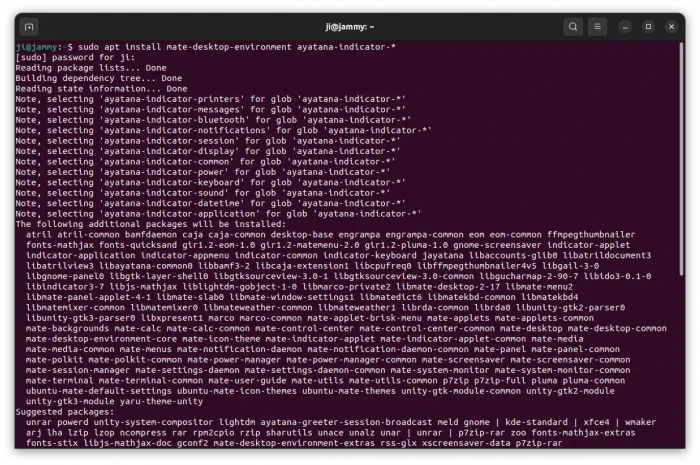
Without re-installing a new system, you can install MATE in Ubuntu, by running command (press Ctrl+Alt+T to open terminal):
sudo apt install mate-desktop-environment
For Ubuntu 22.04, also install ayatana-indicator-* package for no indicator issue.
NOTE: It’s HIGHLY recommended to copy all the package names it’s going to install from the terminal window. In case you want to uninstall the MATE desktop later.
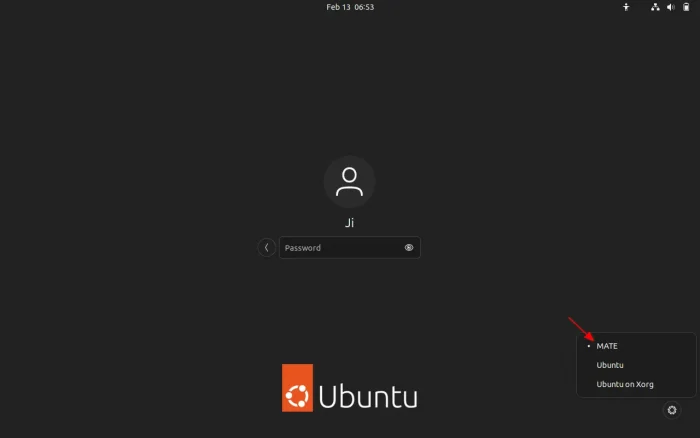
Finally, restart your computer and choose “MATE” session from the login screen.
Uninstall MATE Desktop
If you’ve made a copy of all the installed package names when installing MATE, then run sudo apt remove --autoremove command plus all the package names to remove the desktop.
If not, try running the command below in terminal instead:
sudo apt remove --autoremove mate-desktop libcaja-extension* ayatana-indicator-common libmate-panel-applet*
The command should remove the most packages for MATE Desktop environment. But, you need to keep an eye on terminal output before hitting ‘y‘ to start uninstalling process, since it may also uninstall some useful packages.

